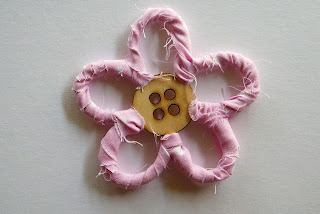
Step 1- Cut fabric into 1cm - 2cm strips

Step 2 - wrap strips around the wooden flower, making sure you go around the first part twice to keep it down.

Step three – after you’ve finished wrapping the fabric around the flower, secure any loose ends with a small amount of glue.

Step four – embellish the centre of the flower (I’ve used a button from the Christmas Carnival embellishment pack)
.JPG)
Step five – attach to your card or layout.
Make sure you head over to the Kaisercraft Blog for more tips and ideas. There will be lots of new layouts on there too, using all the new Q2 ranges. I cant wait to see what everyone has come up with. Also, if you get a chance, make sure you check out the Imaginisce blog. They are introducing a Designer a Day, and showing some examples of their gorgeous work. (I'm still on such a high that I was chosen!)
I haven't been scrapping much over the last few days because Emily has been SO sick with the chicken pox. The poor little muffin has it really bad on her face, much worse than Jack did, and hasnt let me brush her hair for days because they are all over her scalp too. She's looking a bit brighter today and is eating again, so hopefully the worst is over. I've just pulled out all my supplies out so hopefully I'll get something done today!

4 comments:
wow thanks for that Sam!!! Can't wait to give it ago!!
Poor little poppet. She looks miserable. I hope Emily is on the improve now Sam.
Love the flower, might have to give that a go.
what a good idea to cover the wooden flower!!!!
is Em feeling better already?
Awww poor sweetie! Great flower tutorial!
Post a Comment